1. Choosing the Right Healing Herbs for Your Garden
If you’re dreaming of growing, harvesting, and brewing your own healing herbal teas right at home, the first step is picking the right herbs. The United States has a wide range of climates—from the cool Pacific Northwest to the warm South—so it’s important to choose herbs that will thrive where you live. Let’s explore some popular medicinal herbs that are easy to grow across much of the country and offer wonderful wellness benefits.
Popular Healing Herbs for American Gardens
| Herb | Best Climate | Main Wellness Benefits |
|---|---|---|
| Chamomile | Cool to mild (Zones 3–9) | Calming, aids sleep, soothes digestion |
| Mint (Peppermint/Spearmint) | Most regions (Zones 3–11) | Supports digestion, freshens breath, relieves tension |
| Lemon Balm | Mild to warm (Zones 4–9) | Reduces stress, uplifts mood, supports relaxation |
Selecting Herbs for Your Personal Wellness Goals
Think about why you want to make herbal tea. Are you hoping for better sleep, less stress, or a happy tummy? Each herb brings its own special health benefits. For example, chamomile is famous for helping with relaxation and sleep. Mint is a favorite for soothing upset stomachs and adding a refreshing kick. Lemon balm can help lift your mood and calm your nerves.
How to Choose Herbs for Your Region
- Check your USDA Plant Hardiness Zone to see which herbs will grow best in your area.
- Visit local nurseries or farmers markets to see what herbs are thriving nearby.
- If you’re short on outdoor space or live in a colder region, many herbs do well in pots indoors by a sunny window.
Pro Tip: Start Small!
If you’re new to gardening, pick just two or three kinds of herbs to begin with. This makes it easier to learn how each plant grows and what they need.
2. Planting and Caring for Your Herbal Tea Garden
Whether you have a big backyard or just a small apartment balcony, starting your own herbal tea garden is easier than you might think! Here are some easy-to-follow tips to help you grow healthy, flavorful herbs perfect for brewing healing teas.
Choosing the Right Spot
Herbs love sunlight! Most tea herbs like mint, chamomile, lemon balm, and lavender need at least 6 hours of direct sunlight per day. If you’re gardening indoors or on a balcony, choose the sunniest spot possible—south-facing windows work great.
Soil Basics for Healthy Herbs
Good soil is key to happy herbs. You’ll want soil that drains well so roots don’t get soggy. In the U.S., most gardeners use organic potting mix for containers or enrich backyard soil with compost. Here’s a quick comparison:
| Soil Type | Best For | How to Improve |
|---|---|---|
| Potting Mix | Pots & Small Spaces | Add compost or worm castings for nutrients |
| Garden Soil | Backyards & Raised Beds | Mix in organic compost and check pH (6-7 is ideal) |
Watering Your Herb Garden
Herbs don’t like to sit in water but also shouldn’t dry out completely. Water when the top inch of soil feels dry. In hot American summers, you may need to water every day—especially for pots on balconies.
Quick Watering Tips:
- Water early in the morning to prevent evaporation.
- Avoid wetting leaves to reduce disease.
- Pots dry out faster than garden beds—check often!
Organic Gardening Practices Common in the US
Many Americans prefer organic gardening methods to keep their herbal teas safe and healthy. Here are some popular practices:
- No chemical pesticides: Use neem oil, insecticidal soap, or introduce ladybugs for pest control.
- Naturally enrich soil: Compost kitchen scraps and yard waste for homemade fertilizer.
- Mulching: Add a layer of straw or wood chips around plants to keep moisture in and weeds out.
- Crop rotation: Change up where you plant different herbs each year if you have space—this helps prevent soil diseases.
Herbs That Grow Well in American Gardens
| Herb | Main Benefits | Sunlight Needs | Notes |
|---|---|---|---|
| Peppermint | Sore throat, digestion | Full sun/Partial shade | Spreads fast—keep in pots! |
| Lemon Balm | Anxiety, sleep aid | Full sun/Partial shade | Tolerates most soils; can be invasive |
| C chamomile | Calm nerves, aid sleep | Full sun | Tiny daisy-like flowers; self-seeds easily |
| Lavender | Mood boost, relaxation | Full sun | Loves dry soil; don’t overwater |
A Few More Helpful Tips:
- If using containers, make sure they have drainage holes.
- Avoid over-fertilizing; too much can make herbs less flavorful.
- Pinch back leafy growth often—this keeps plants bushy and productive!
Your herbal tea garden can fit almost anywhere and brings fresh, healing flavors right to your cup. With these simple steps, you’ll soon be sipping homegrown goodness!
![]()
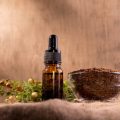
3. Harvesting and Drying Techniques for Maximum Potency
Knowing when and how to harvest your herbs is key to making the most flavorful and healing herbal teas. Picking your herbs at the right time helps preserve their natural oils, aroma, and medicinal benefits.
When to Harvest Your Herbs
The best time to harvest depends on the type of herb you’re growing. Most leafy herbs are best picked just before they flower, when their oils are strongest. Early morning, after the dew dries but before the sun gets too hot, is generally ideal. Here’s a quick reference:
| Herb Type | Best Harvest Time |
|---|---|
| Leafy herbs (like mint, lemon balm) | Before flowering, early morning |
| Flowering herbs (like chamomile, lavender) | When flowers are fully open but not faded |
| Roots (like echinacea) | Late fall after foliage dies back |
How to Harvest Safely and Effectively
Use clean, sharp scissors or garden shears to snip stems or leaves. Always leave enough of the plant so it can continue growing—never take more than one-third of the plant at a time.
Tips for Quality Harvests:
- Avoid harvesting from plants that have been sprayed with chemicals.
- Shake off any bugs and rinse leaves gently if needed.
- Pat dry with a clean kitchen towel.
Drying Methods for American Kitchens
Proper drying locks in your herbs’ flavor and health benefits. There are two easy ways you can try at home:
1. Air Drying
- Tie small bundles of herbs together with kitchen twine.
- Hang them upside down in a warm, dry place out of direct sunlight—like a pantry or laundry room.
- Allow 1–2 weeks for complete drying. Leaves should be crisp and crumble easily.
2. Using a Dehydrator
- Spread washed and dried herbs in a single layer on dehydrator trays.
- Set your dehydrator to low (about 95°F to 115°F).
- Check every hour; most leafy herbs will dry within 2–6 hours.
Comparison Table: Drying Methods
| Method | Time Needed | Main Benefits | Main Drawbacks |
|---|---|---|---|
| Air Drying | 1–2 weeks | No special equipment needed; gentle on herbs | Takes longer; needs proper space |
| Dehydrator | 2–6 hours | Quick and efficient; works in humid climates | Requires purchase of appliance; uses electricity |
Storing Your Dried Herbs for Tea Blends
Once your herbs are fully dried, store them in airtight glass jars away from heat and light. Label each jar with the herb name and date harvested—this helps you keep track of freshness. Properly dried and stored herbs can last up to a year while keeping their healing properties strong.
4. Blending and Storing Your Homemade Herbal Teas
How to Create Flavorful and Healing Tea Blends
Mixing your own herbal tea blends is a fun way to experiment with flavors and enjoy the unique benefits of each herb. When blending, consider both taste and wellness properties. For example, peppermint adds freshness and supports digestion, while chamomile brings a soothing, floral note that helps with relaxation. You can combine herbs that complement each other or balance strong flavors with milder ones.
Popular Herbal Tea Blend Ideas
| Herb | Main Benefit | Taste Profile | Blend Suggestions |
|---|---|---|---|
| Peppermint | Digestive support | Fresh, minty | Peppermint + Lemon Balm + Chamomile |
| Chamomile | Calming, sleep aid | Mild, floral | Chamomile + Lavender + Rose Petals |
| Lemon Balm | Mood boosting | Citrusy, light | Lemon Balm + Spearmint + Ginger Root |
| Ginger Root | Anti-inflammatory | Spicy, warm | Ginger + Lemongrass + Hibiscus |
| Lavender | Relaxation | Sweet, floral | Lavender + Chamomile + Mint |
Tips for Blending Herbs at Home
- Start simple: Use two or three herbs per blend until you get comfortable.
- Experiment: Adjust amounts based on your taste preferences.
- Label blends: Write down what’s in each jar so you can recreate your favorites later.
- Taste test: Brew a small sample before making a big batch.
Storing Your Homemade Herbal Teas in True American Style
The way you store dried herbs is just as important as how you grow or blend them. In the U.S., most people use glass mason jars or metal tins—both easy to find at local stores like Target or Walmart, or even online. These containers keep your herbs dry and fresh for longer.
Mason Jars vs. Tin Containers: Pros and Cons
| Mason Jars (Glass) | Tin Containers (Metal) | |
|---|---|---|
| Airtight Seal? | Yes (with screw lid) | Yes (with snug lid) |
| Light Protection? | No (unless kept in cupboard) | Yes (blocks light) |
| Easy to Label? | Yes (stickers/marker) | Yes (stickers/marker) |
| Aesthetic Appeal? | Cute, classic American look; see-through display of herbs inside. | Sleek; keeps contents hidden for a minimalist vibe. |
| Cost & Availability? | Very affordable; found in most US households. | Slightly pricier; available at specialty shops or online. |
Best Storage Tips for Herbal Teas at Home:
- Store in a cool, dark place: Keep your jars or tins away from sunlight and heat sources (like stoves or windowsills).
- Avoid moisture: Make sure your herbs are completely dry before sealing to prevent mold growth.
- Date and label everything: Note the date of drying/blending to use the oldest stock first. A simple sticky label works great!
- No refrigerator needed: Just a pantry or kitchen cabinet is perfect—no need to refrigerate dried herbal teas.
- Avoid plastic bags: They don’t seal as well and can let in air over time.
This approach will help your homemade herbal teas stay flavorful and potent for months—ready for whenever you need a comforting cup!
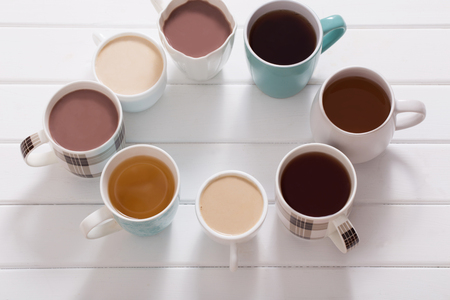
5. Brewing the Perfect Cup: Recipes and Rituals
Step-by-Step Brewing Instructions
Brewing herbal tea at home is a relaxing ritual that brings out the best flavors and benefits from your garden herbs. Here’s how to make the perfect cup, American-style:
Basic Herbal Tea Brewing Steps
| Step | Instructions |
|---|---|
| 1. Gather Ingredients | Pick fresh or dried herbs such as mint, chamomile, or lemon balm. |
| 2. Measure Herbs | Use 1 tablespoon of fresh herbs or 1 teaspoon of dried herbs per 8 oz (1 cup) of water. |
| 3. Boil Water | Bring water to a boil, then let it cool for a minute so it’s just below boiling (about 200°F). |
| 4. Steep Herbs | Place herbs in a teapot or mug, pour hot water over them, cover, and steep for 5–10 minutes. |
| 5. Strain and Serve | Strain out the herbs, sweeten with honey if desired, and enjoy! |
American-Style Tea Rituals
Americans often enjoy herbal teas as part of their morning routine, afternoon pick-me-up, or evening wind-down. Try these simple rituals to add wellness to your day:
- Morning Boost: Brew peppermint or lemon verbena tea to start your day with energy.
- Noon Refresh: Iced hibiscus tea with a slice of lemon is perfect for hot afternoons.
- Bedtime Calm: Wind down with a warm cup of chamomile or lavender tea before bed.
Simple Seasonal Tea Recipes
| Season | Main Herbs | Brew Recipe | Wellness Benefit |
|---|---|---|---|
| Spring | Lemon Balm & Peppermint | Brew equal parts for 7 min; serve hot or iced. | Energizing & uplifting mood support. |
| Summer | Lemongrass & Hibiscus | Brew 1 tbsp each in cold water overnight; serve chilled. | Cools the body and hydrates. |
| Fall | Sage & Ginger Root | Brew with thin ginger slices for 10 min; add honey. | Soothe sore throats and boost immunity. |
| Winter | Chamomile & Cinnamon Stick | Brew together for 8 min; add milk if desired. | Calms nerves and supports restful sleep. |
Tips for Customizing Your Tea Experience
- Add local honey or maple syrup for natural sweetness.
- Squeeze in a bit of citrus for extra vitamin C.
- Create your own blends based on your favorite scents and tastes.
The joy of brewing your own healing herbal teas comes from experimenting with fresh ingredients and making every cup uniquely yours. Enjoy these easy steps and American-style rituals all year round!